
Easy Way to Make a Low Quality Picture Look Better
If you want to protect your beautiful memories, there is nothing better than capturing photos of those special events. This is how billions of people save their memories across the world. But it becomes painful when your pictures lose quality. It is because of their low resolution. The use of a high-quality camera can help you avoid facing this problem.
But you may face a low-quality picture problem, even with the latest camera. A number of reasons are associated with this issue. You will see them later in this read. Are you searching for how to fix low-quality pictures? This guide lists 3 efficient ways to enhance picture quality. Read more to learn how you can benefit from these photo repair methods.
Part 1. The Most Common Reasons Associated with Low Quality Pictures
You must be familiar with the leading causes of low quality pictures before you move toward enhancing the image quality. The reason behind this fact is that when you know the reasons associated with this issue, fixing it becomes super easy. Here are the most common causes of low-quality photos.
1. Compressed Photo
Many people usually compress photos by removing or grouping specific elements when uploading pictures on websites. Doing this reduces the size of your image. At the same time, the picture quality also gets affected.
2. Unwanted Noise
Photos captured in an environment where there is a lack of light often get blurry and give a grainy look. You can observe unwanted noise in these pictures, like dark, tiny spots or blotches.
3. Poor Printing
If the image output is downgraded, your pictures will be of low quality. Though nowadays, very few people print their photographs, low-cost printers are the biggest reason behind this problem. They print grainy or blurry photos.
4. Sharpness
Combining both acutance and resolution is called the sharpness of your photo. Many people often try to enhance the picture’s sharpness. As a result, they compromise on the image quality.
5. Picture Resampling or Resizing
One of the leading reasons that cause low-quality images is resizing or resampling. When you try to resize or edit your picture forcefully, it becomes blurry, distorted, or highly pixelated. Therefore, always make sure that the image aspect ratio is correct.
Part 2. How to Fix Low Quality Pictures Online?
Do you want to enhance picture quality online? Searching for a reliable tool to make low-quality pictures look better? Try Repairit Online Photo Repair. This online application supports different photo formats, including RAF, DNG, JPEG, CR2, NEF, TIFF, CR3, and more. It not only allows you to produce better picture quality but also saves you time when performing this action.
The key features of Repairit Online Photo Repair are as follows.
- Elegant and user-friendly main interface.
- It repairs photos without affecting their quality.
- This tool does not save your photos permanently on the online server but deletes all pictures within 3 hours.
- You can fix low quality pictures in different formats.
- Online payment processing is secured with a 2048-bit connection.
- You are free to upload pictures from any device, i.e., USB flash drives, hard disks, digital cameras, and more.
A Guide to Increasing Picture Quality with Repairit Online Photo Repair
Visit the official website and start following the steps listed below.
Step 1: Tap on “+Add” to upload low-quality photos from your storage device.
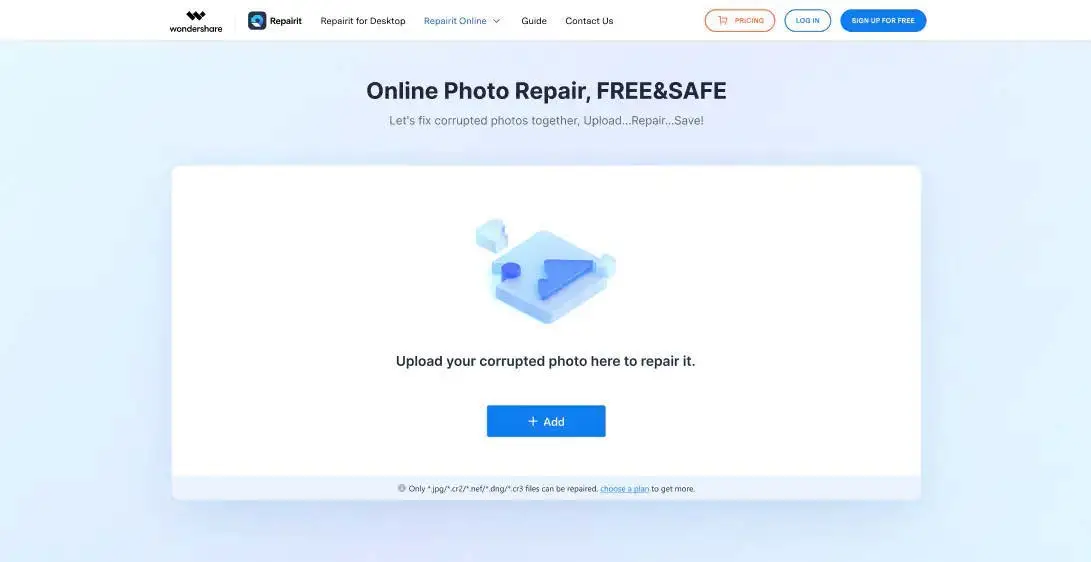
This tool enables you to fix multiple low-quality images at the same time so that you can upload more than one picture simultaneously. Every picture you upload will be shown as displayed in the image below.

Step 2: Click “Repair” and start the photo repair process. It will fix the sharpness and resolution of your image to make it look better.

Note: For advanced photo repair, you will have to upload the sample picture in the same format as the low-quality image.
Step 3: Now, preview the repaired picture to confirm that it is fixed correctly.
Step 4: Save the picture repaired online. When selecting the path, make sure it is different from the one where your low-quality photos are stored.
Part 3. How to Enhance Picture Quality? 2 Effective Methods!
Here are two more ways to increase picture quality, i.e., using Adobe Photoshop and Wondershare Repairit.
1. Convert Low Quality Pictures to High Quality with Photoshop
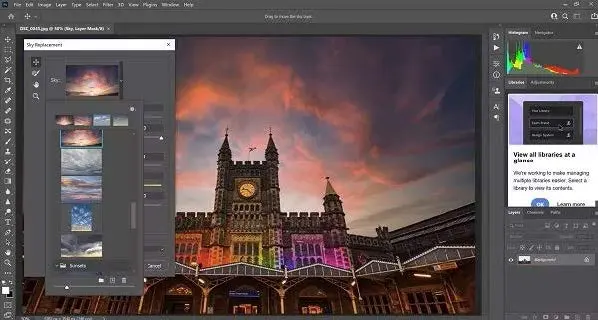
Photoshop is a fantastic photo-editing tool you can use to fix low-quality pictures. Be it adjusting the image’s contrast, sharpness, colours, or any other similar parameter, Photoshop has got you covered. This is why most designers worldwide use this software to make low-quality photos look better. Below is a step-by-step guide to converting low-quality images to high quality with Photoshop.
Step 1: Once you open Adobe Photoshop on your computer, load your low-quality photo into it.
Step 2: Now choose the option “Filter and Blur.”
Step 3: Select “Gaussian Blur” and move the slider to adjust the range. Then, tap on “OK.”
Step 4: It is time to select the option “Filter and Sharpen” and choose “Unsharp tool.” Keep sliding it until you get the desired outcomes.
Step 5: Now, click on the “File” menu and save the enhanced picture on your computer.
2. Fix Low Quality Pictures with a Photo Repair Utility
If you are still in search of a trusted tool to produce better picture quality, you must try Wondershare Repairit Photo Repair. Just like its online version, the desktop application of this photo repair software also supports a range of picture formats, like ORF, GPR, PNG, NEF, DNG, CRW, JPEG, SR2, and more. The top advantages of using this tool are listed below.
- Severely damaged photos can easily be repaired with this software.
- No limit to the number and size of the repairable photos.
- It enables you to preview the repaired pictures before you save them on your system.
- 24/7 free tech support and a money-back guarantee come with the paid plan.
- It comes with an easy-to-navigate user interface.
- Both Windows and Mac versions are available.
- It supports various photo formats.
- This tool features batch picture repair.
A Guide to Increasing Picture Quality with Repairit Photo Repair
Download this utility on your system and start following the steps below.
Step 1: Load low quality pictures by hitting the “+Add” button from the main interface.

Once your photo is loaded into the tool, you will be able to see it. Plus, you can load multiple pictures at the same time to repair them simultaneously.
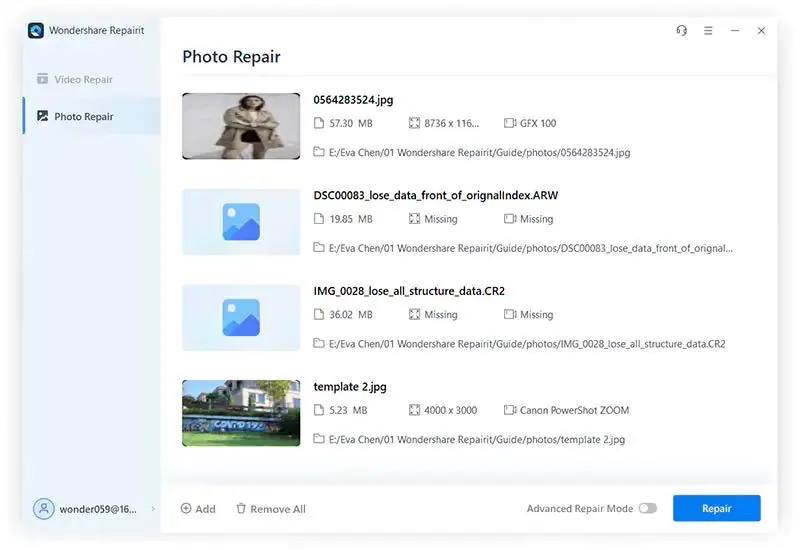
Step 2: Click on “Repair.” Doing this will allow you to fix wrong colouring, grey images, pixelated pictures, and other similar problems in your photos.
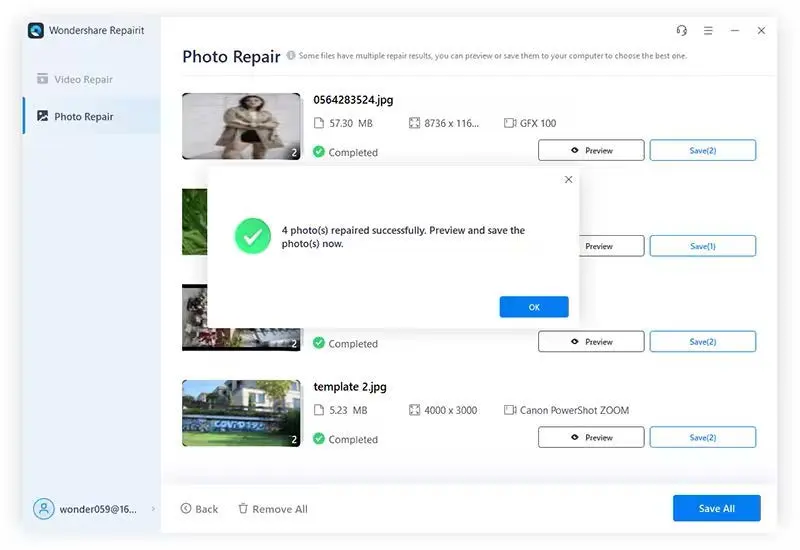
Step 3: Repairit gives you the option to preview the repaired images before downloading them on your device. For this, hit the “Preview” button.
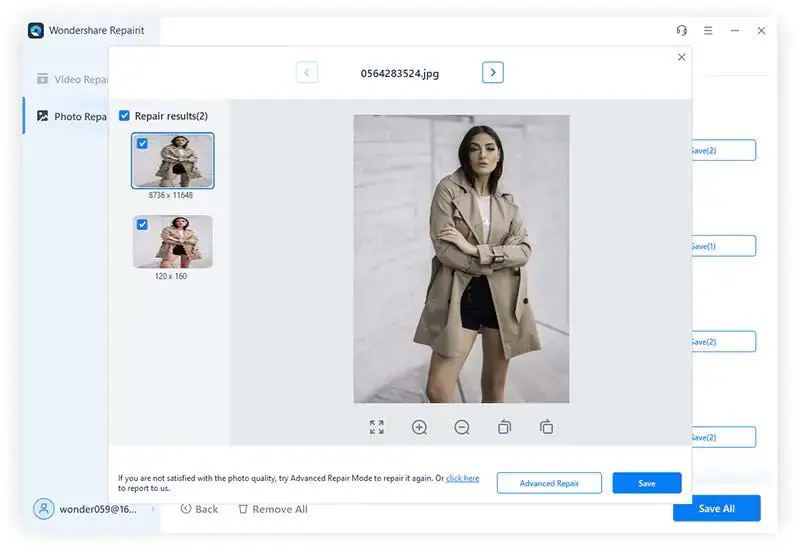
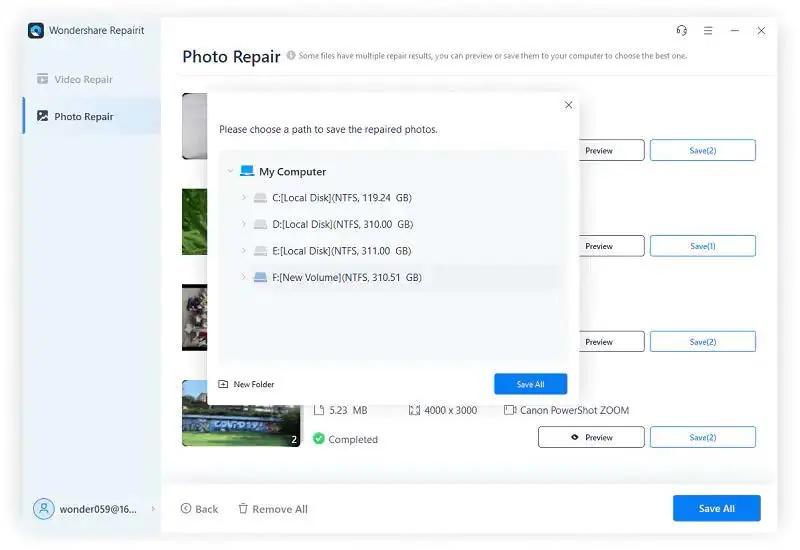
Step 4: Now, save the photo on your computer after choosing the desired location. All you need to do is to click on the “Save” button. If you have multiple repaired photos to save on your system, tap on “Save All.”
Final Words
Taking photos of memorable moments in your life helps you enjoy the old memories in the future. But if the old photos are blurry, grainy, or low-quality, it becomes a frustrating scenario. What if your important pictures have lost their quality? Well, you can now repair them using different photo-editing and image-repair tools available in the market. But choosing a reliable utility often becomes a difficult job.
If you are searching for a great tool to enhance picture quality online, try Repairit Online Photo Repair. It ensures 100% secure image processing when repairing your low-quality photo and keeps your data private.
At the same time, if you need a desktop-based application to perform the same task, trying Repairit Photo Repair will surely be worth it. You can install this software on Mac and Windows systems. Give its free trial a try before purchasing the premium plans.
